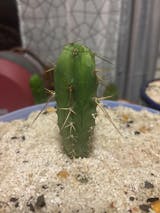
How to Propagate your San Pedro Cactus....
NOTE: We sell 100's of exact cactus cuttings to get your collection started. SHOP HERE
Easy to do! In this blog I will quickly show you how to do this from your established San Pedro (or almost any columnar/tall growing cacti), as well as from a smaller potted specimen.
What you need: A knife, a piece of cardboard/towel, a container, soil, and a little time.
This a 5-6' San Pedro planted on a slope. Notice the shorter sections where you see new tops growing. These have started in areas that have been cut prior.

Sometimes you get 1,2 and even 3 new tops growing from the recently cut areas.

This is a basic potted 18" San Pedro, started as a 12" cutting last summer, getting ready to have it's top 12" or so cut off.


Try and always use a clean knife, if cutting multiple cactus, make sure to sterilize w/ rubbing alcohol if you cut into any infected sections. (sometimes cactus get sick and start rotting in sections and you have to amputate, sterilized cutting tools are helpful so as not to spread any infection).

Now we need to dry/callous the end. If it's sunny outside, it's easiest to just expose the end to direct sunlight! If doing it this way, make sure you cover the length of the cactus to protect it from sunburn. As these grow upwards, when they are laid on their sides they can get burned! I usually just put a piece of cardboard along it's length. I usually just leave in the sun like this for 1-2 days, then on a shelf/table in a dry and well lit area.

Fast forward a week or two or three depending on the time of year, pictured are three cuttings all showing basic coloring on their ends. Colors can range from white, brown, orange, gray to black etc. in areas. This is a not a problem....as long as the ends are DRY and the coloring is not mold etc. If you can't tell, a quick wipe with a paper towel and rubbing alcohol will help clean it again. Sometimes when they arrive if you purchased online, after being in a dark box for 3-4 days, some surface mold may develop. Just do a quick wipe as noted and allow to dry. If it's soft, mushy or infected for whatever reason, simply start the cutting over remembering to sterilize w/ each cut. You can go 1/4" inch, 1/2", 1" etc. whatever you need to do to get back to healthy colored cactus.

NOTE: We sell 100's of exact cactus cuttings to get your collection started. SHOP HERE
For this Blog, they are calloused and ready for the next step, potting! Side note question we are often asked, "How long can I wait until I have time to pot my cactus"? You can forget about your cutting for months with no problems, ideally left somewhere out of direct sun, and kept dry. Sometimes though, factors like temps, it's growing season etc. your cactus cutting can begin growing again from it's tip which would begin to stretch and bend upwards. Picture shows a tip that bent this way, it will gradually straighten back up.

They can also begin shooting out roots along it's entire length on the side facing down. This is called planting logs, just laying them on soil horizontally vs vertically. This happens naturally in the wild when they snap and fall down.

Back to potting. Lots of info on soil etc. out there, the main thing is soil that drains well, we use perlite and sand out here, use whatever you can, but stay away from houseplant soil that retains moisture vs soil that drains quickly. Rule of thumb is never to water if soil is wet!
I fill my 1 gallon containers up about halfway with DRY soil. Some people use damp soil, I usually try and go dry, but you can experiment... I place my dried cactus cutting into the container.

And I add 2-3" of dry soil and usually don't pack down, just leave it fluffy if possible or just enough to keep it from falling over. I don't like to go all the way to the top as I have found when I begin watering, the soil will settle and it will leave me w/ approx. 2" of space for water to collect and then settle down. If soil line is too high, you have to water and wait to make sure your watering reaches the bottom. (I always try and water all the way through the container, it helps the rooting process go deep and stronger vs the roots just sitting on the surface.)
I try not to water for approx. 2 weeks. There are no roots to absorb water and if there are any issues w/ my cutting that I did not catch, it helps lessen any infections settling in. Open wounds and wet soil can increase the chances of infection, fungal problems etc.
I place the newly potted San Pedro(other columnar cacti) in a dry place out of direct sunlight. In this picture they are outside under some Oak trees.

After a few weeks, months, when roots have begun forming and they can take in water etc. I will move to direct sunlight. We grow our cactus all over our 5 plus acres of property, some in full sun, some partial, some completely shaded. Lots of different soil types as well from natural decomposed granite to soil amended w/ mulch etc. Colors can vary from light green to dark green, experiment with yours, find the location you think your cactus is happiest at/or location you like the most, and enjoy.

NOTE: We sell 100's of exact cactus cuttings to get your collection started. SHOP HERE
You are now ready to do this on your own, it's the easiest way to turn your single San Pedro into an actual cactus patch! Have fun and don't hesitate to email us w/ any cutting questions!
Cheers


